COMING SOON
Loom Knit Flowers: The Easiest DIY Guide to Crafting Beautiful Blooms
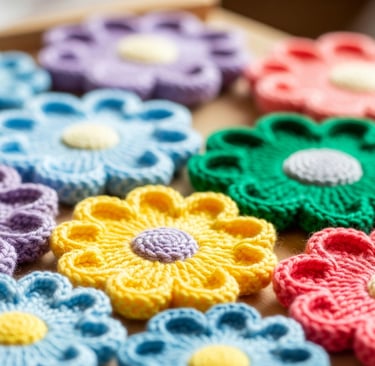
Why buy a bouquet when you can make a gift that truly lasts? A handmade loom flower is a tangible symbol of the time, care, and love you poured into it, showing someone they're worth more than a quick stop at the florist. Learn how to easily turn yarn and a round loom into a permanent, perfect floral arrangement—no knitting experience required.
9/1/20256 min read
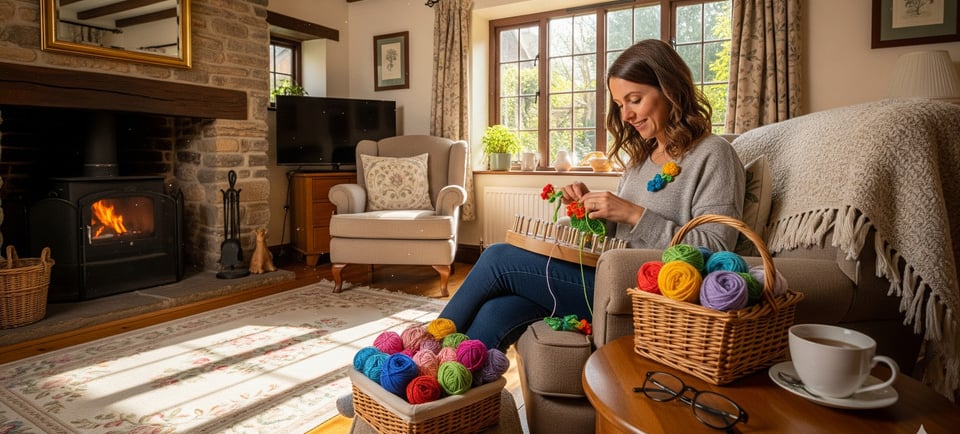
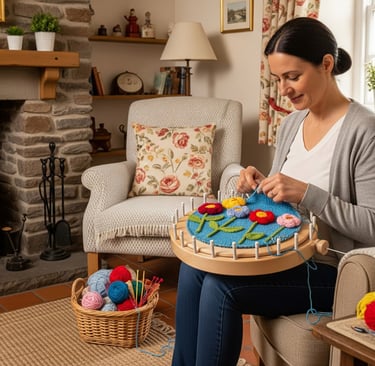
It's funny, isn't it? We spend so much of our time trying to find the perfect gift, something that feels just right for that special person in our life. And while a beautiful bouquet from the local florist is always a winner, there's just something magical about a flower you've made yourself. A handmade loom flower carries a piece of your heart with it—a tangible symbol of the time, care, and love you poured into it. It’s a gift that says, "You're worth more than a quick stop on my way home."
Honestly, if you've ever felt the urge to create something beautiful, something you can truly be proud of, then loom knitting flowers might just be your next favorite hobby. You'd be surprised how simple it is to turn a little bit of yarn and a round loom into a permanent, perfect floral arrangement. You don't need to be a master knitter, a yarn wizard, or even have a clue about crafting. You just need a few basic supplies and a little bit of patience.

The Buzz About Loom Knitting: What's the Big Deal?
If you've heard the term "loom knitting" and pictured some huge, complicated contraption, let me just set the record straight. Loom knitting is often referred to as "knitting without needles," which is a fantastic way to describe it. Instead of working with two pointy sticks, you use a circular or long loom with pegs and a small hook to create your stitches. It's incredibly forgiving, a whole lot faster than traditional knitting, and a total game-changer for anyone who has ever gotten tangled up in their needles. It's truly a craft for everyone—even the kids can get in on the action!
Think of it this way: loom knitting is like a simplified, almost foolproof version of a classic craft. You get all the satisfaction of making something with your own two hands, minus the frustration. Plus, the end results are just as beautiful and intricate, especially when you're making something like a flower.
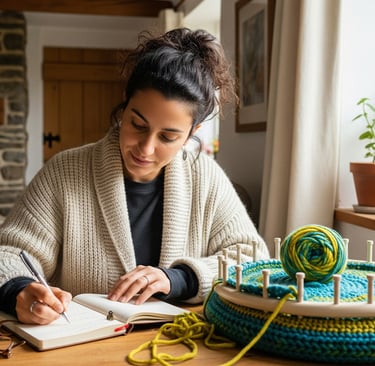
So, how do we start?
First, you'll need to gather your gear. Here’s a quick list of what you'll need for this DIY floral project:
A Round Knitting Loom: A 24-peg loom is a great starting point for a nice-sized bloom.
A Loom Hook: This usually comes with your loom. It's your trusty tool for lifting those loops.
Yarn: Any worsted-weight yarn will work wonderfully. This is a perfect project for using up all those little scraps you have sitting around from other projects—that's what we call "stash busting" in the crafting world!
Scissors: Gotta snip that yarn.
A Tapestry Needle: This little guy is for weaving in your ends and shaping your flower.
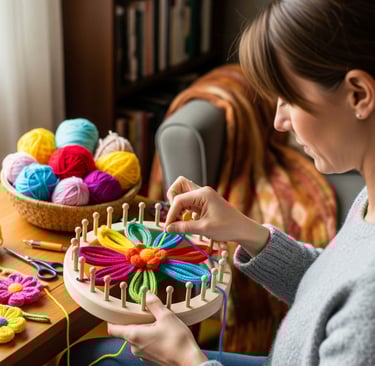
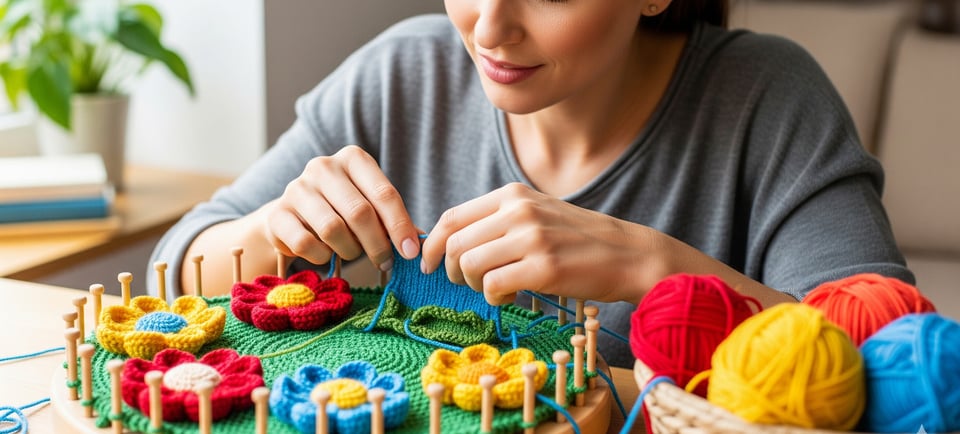
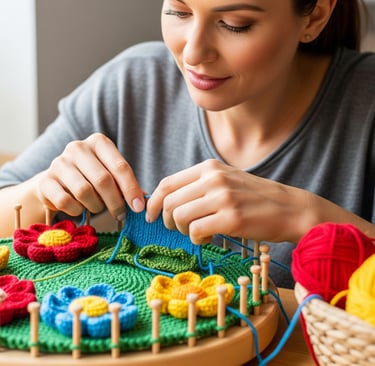
Let's Get Loopy: The "Flat Hat" Method
You know what? One of the most popular ways to create a loom-knit flower is a little bit of a happy accident! It's called the "Flat Hat" method, and it came to be when a knitter made a mistake on a hat and realized it looked exactly like a flower when flattened. How cool is that? This method is perfect for a full, multi-layered bloom with plenty of petals.
Cast On: To get things started, you'll need to cast on. This means wrapping your yarn around the pegs. We'll use the e-wrap method. It’s pretty straightforward—just wind your yarn around each peg, making a little "e" shape. Do this all the way around the loom.
Knit the Brim: Once you've cast on, you'll start knitting. With the e-wrap stitch, you’ll just wrap each peg again, and then use your hook to pull the bottom loop up and over the top loop, and off the peg. Do this for about 7 rows. You can do more or less depending on how many petals you want and how full you'd like them to be.
Create the Brim: Now, here's a neat trick. To create a defined brim, you'll fold the knitting in on itself, taking the very first row of loops and placing them back on the pegs. Then, you'll knit off those loops. It’s like magic! You're creating the folded edge that will become the petals.
Knit the Middle: After the brim is done, keep knitting for another 5 rows or so. This will become the center of your flower.
Gather and Close: This is where it all comes together. Cut a generous tail of yarn and thread your tapestry needle. Now, you’ll go around the loom, taking each loop off the peg and threading it onto the needle. Once all the loops are off, you'll have what looks like a little hat. Simply pull that tail of yarn tight to gather it all up, and the piece will curl in on itself.
Give it a little pinch and a pull, and voila! You've got yourself a beautiful, puffy, multi-petaled flower.

Loom Knit Flowers: A Few FAQs
Can I make these flowers with different types of yarn?
Absolutely! This is a fantastic project for experimenting with different textures. Chunky yarn will give you a bigger, bolder bloom, while a thinner yarn will make a more delicate flower. You can even try using multiple strands of yarn at once for a marled, multi-colored effect. The possibilities are endless!
What can I use loom-knit flowers for?
So many things! They make wonderful embellishments for hats, scarves, or blankets. You can attach them to a hair clip for a cute accessory or string a few together to make a fun garland. Honestly, they're the perfect little detail to add a bit of whimsy and personality to almost anything.
I keep dropping stitches. What am I doing wrong?
Don't worry, it happens to everyone! The key is to keep your tension consistent. Make sure you’re not wrapping your yarn too tightly around the pegs. If you find yourself having trouble, slow down and focus on keeping each loop a little loose. After all, it's just yarn! No need to get stressed about it.
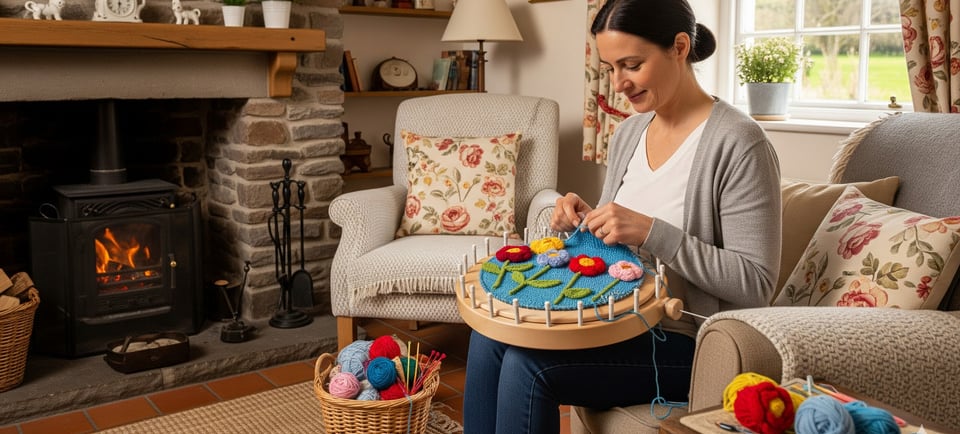
The "Wrap-and-Stitch" Method: Another Way to Bloom
So, while the "Flat Hat" is a fan favorite, there's another super simple way to make a flower that's all about wrapping and stitching. This method is awesome for creating flat flowers, perfect for attaching to things.
Yarn Up: Anchor your yarn to a single peg and then wrap it around the opposite peg. Now, you’re going to go around the loom, wrapping the yarn from the center out to each peg. You'll make two or three layers, pushing each layer down as you go. You'll end up with a wheel of yarn on the loom.
Stitch the Center: This is the fun part! Get your tapestry needle and thread it with a contrasting color yarn. We’re going to sew the center of the flower together. Start by creating a plus sign (+) across the middle, going in and out of the center and through the spaces between the petals. Then, go back and create an "X" over the plus. Keep stitching until you've woven a solid center that holds all the wrapped yarn in place.
Finishing Touches: Once the center is secure, you can slide your finished flower off the pegs. Use your tapestry needle to weave in the loose ends and tidy things up. Just like that, you have a beautiful, flat flower ready to be used!

Time to Grow Your Own Garden
Whether you're making a gift for a friend or just creating a fun project for yourself, loom knitting a flower is a deeply satisfying experience. It’s a chance to put on some music, unwind, and create something truly lovely with your own hands. Plus, a handmade flower never wilts or fades—it's a little reminder of your creativity and dedication that will last forever.
So go ahead, give it a try. Grab a loom, a ball of yarn, and make yourself a little garden of handcrafted blooms. You’ll be surprised at how quickly you go from a curious beginner to a proud creator, with a whole new way of looking at a simple bouquet.